
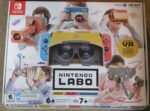
Nintendo Labo VR Kit: Goggles
 Nintendo made a splash last year with their Nintendo Labo kits. These building toys had you folding carboard around your Nintendo Switch game system and controllers to play games in totally new ways. TIME Magazine even named Nintendo Labo one of the best inventions of last year, and even I awarded it my Game of the Year in 2018 as well! And now Nintendo has done it again with the Labo VR Kit. This kit lets you build VR goggles and accessories to play virtual reality games and activities on your Nintendo Switch. You can get two different versions: one that lets you just build the goggles and blaster, and one that lets you build those and many more. Naturally I got the bigger set, and we’ll look at each thing you can build separately, starting with the VR goggles first.
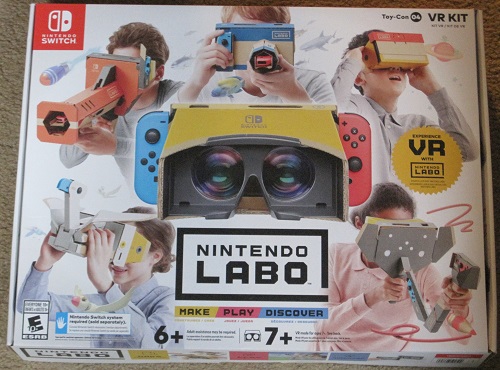
Here’s a bigger picture of the box for the Labo VR Kit. You can build the goggles, camera, elephant, bird, wind pedal, and blaster.
Just like the other Labo sets, it also comes with a game that has three different parts. In “Make,” they have animated instructions on how to build and fold each of the accessories. In “Play,” you play the games that go with the things you build. And in “Discover,” you learn how the toys work. So it’s truly educational. One good thing about the VR games is that even I can play most of them. You see, I’ve been blind in my left eye since birth, and can’t see 3-D effects in games and movies that use them. But I can still play the Labo VR stuff just fine, for the most part. They even explain how people with two eyes can see 3-D effects in the Labo Discover section, and did a good job explaining how it all works.
Each kit in the Labo series costs about $70 to $80 each. While that sounds pretty expensive, and it is, there are some things you should consider. Other comparable educational toys do cost about as much, and these kits do include a game, which runs about 50 bucks anyway. Plus the cardboard is very high quality and is printed and perforated. I used to work in printing so I know how expensive that can be! So if you look at it that way, it doesn’t seem so bad. But I can still understand why people would think this is a hefty chunk of change anyway.
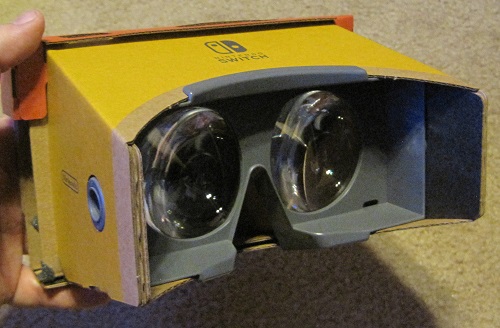
The first thing that you should build is the VR goggles, naturally. They have plenty of warnings in the game and on the box and lenses themselves to not look directly into the sun or use the magnifying glass lens to start fires using the sun. There were so many warnings that it was almost silly, but in today’s sue-happy society, I guess Nintendo had to do that. Here’s a picture of the lenses when you take them out of the box that had warning stickers on them, too!

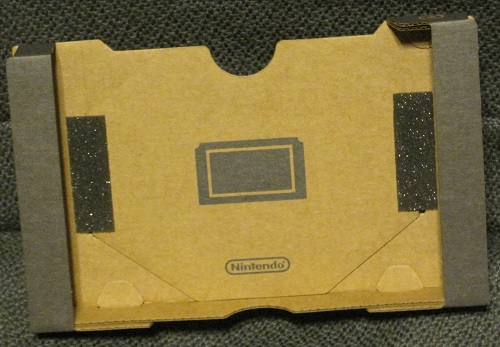
And here are the goggles all built. There is no strap to attach them to your head, you just have to hold them the whole time. You’d think this would be a problem, but it really wasn’t. You toggle the Switch screen to VR mode and slip it in the slot in front of the lenses and you can start playing.
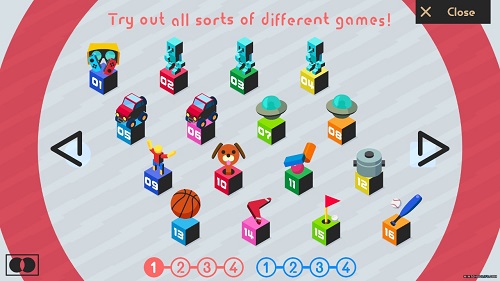
Even with just the goggles themselves, you can play dozens of mini VR games and activities. I won’t go over them all, because there are just so many. But a lot of them remind me of what could’ve been a WarioWare VR title, and made me remember an article I wrote a couple of years ago about what VR games I would like to see. When I wrote that article, I had no idea that Nintendo’s first foray into VR since the Virtual Boy would require cardboard!
There are also a bunch of VR videos you can watch with the goggles. I wish these were 360 degree viewed like the games, but they’re still pretty neat. A lot of them have you looking at different animals, magic tricks, or eating food. But my favorite is one where you peer inside a Virtual Boy and watch the first few seconds of the Mario’s Tennis title screen! Makes me wonder if they could do a Virtual Boy virtual console with this!
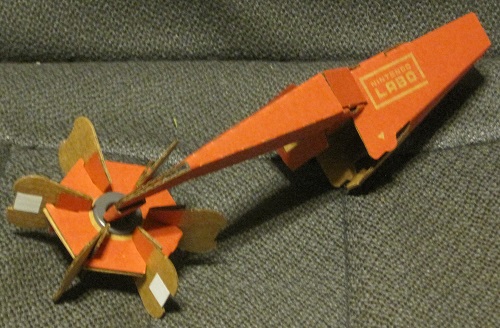
There are a couple of small accessories that you can build that we’ll go over here, too, since they’re so little. The first is a pinwheel that you attach to the goggles to play some peashooting and inflating games. Pinwheel, pinwheel, spinning around. Look at my pinwheel and see what I’ve found. Sorry, us 80’s kids have to sing that when pinwheels are involved. Anyway, the JoyCon controller with the IR camera attaches to this one, and it views reflective tape that spins around as you blow on it, and that’s how it knows you’re blowing.
One disadvantage to the VR kit is that nobody can watch you play. That’s where this viewing screen holder that you build comes in. I haven’t used it yet, so I don’t know how it works, but here it is all built. There is one more little accessory that you can build, but we’ll go over it when we talk about the VR Camera next time.
And that’s all I have to say about the goggles. If you’ve ever played any type of VR before, you probably won’t be impressed with the VR tech in the Labo kit. But considering that most VR games cost hundreds of dollars at the cheapest, and thousands of bucks at the most expensive, you’re getting what you pay for here with VR for under a hundred bucks. So it’s a pretty neat little intro to VR otherwise. Next time we’ll talk about the VR Camera you can build!
Kid Factor:
As the Labo kits are educational, they’re very good for kids. But not ALL kids. It’s best for older kids as the things you build can be pretty complicated, and while the cardboard you use is of very high quality, it can break. You can order replacement sheets of cardboard on Nintendo’s web site, but even so, I would still say this is best for older kids who love to build things and enjoy seeing how they work. Also they recommend that very young kids not even use VR or 3-D that much, I guess because of their developing eyes. Reading skill is also involved, and kids would need to be mature enough to take care of their toys. The Labo kits may seem pricey at $50 to $80 bucks, but I really think they’re well worth it.


Discussion Area - Leave a Comment